
What are Premium Cellular PVC Siding Pros, Cons, Cost and Long Term Value? This year, at the International Builders’ Show in Orlando, I saw trends and new products that...
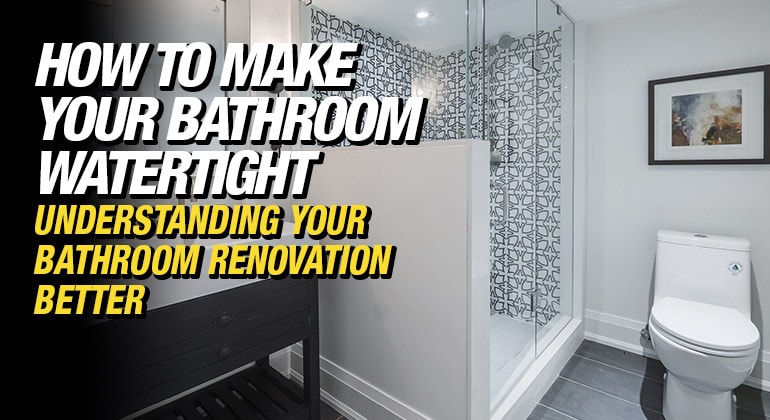
How To Make Your Bathroom Watertight
By Mike Holmes
Mike’s Advice / Bathroom Renovation
Wednesday, October 27th, 2021 @ 10:02am
What You Should Look for in a Bathroom Renovation?
Most homeowners start a renovation by looking at pictures of finished rooms. That’s what I call “eye candy”. This is a good way of getting ideas, but what I try to get across to people is that this is not what renovations are all about.
A good bathroom renovation is about what’s underneath the surface and behind the walls. That is my world, that is why it’s so important to take the time to understand your bathroom renovation better.
It is not the tiles and countertops that matter in your bathroom, it is everything UNDERNEATH and BEHIND your finishes that you should focus on.
RELATED
Your Bathroom is a “Wet Zone”
Bathroom design can be as wide open as your imagination. But along with the design of your bathroom, you have to think about how every bathroom is a “wet zone” or a “wet room”.
Your contractor needs to know how to handle this properly. In fact, everything we do as part of a bathroom renovation should ultimately be about keeping the water from damaging our homes.
Why is it Important to Make Your Bathroom Waterproof?
There are several reasons.
-
The lifespan of your bathroom:
Using better construction products and methods means you’re going to have a new bathroom that lasts much longer. In my opinion, it is worth spending the money from the start on the right products, so your bathroom would last longer.
-
Mold:
When water continually or repeatedly gets into places where it does not belong, like under the finished floor behind the tiles, or under the lip of your drop-in sink, you are going to get mold.
-
Decay and rot:
Excess moisture and mold will cause decay and rot in your home. I’m not talking about a little bit of mildew on the caulking, I am talking about the rot that goes right into the wall studs and the floor joists.
How to Waterproof for Bathroom Walls

Schluter® KERDI-BOARD is the ideal substrate for walls and ceilings and is so versatile you can build almost anything with it.
The best way to achieve a watertight bathroom is to use a continuous layer of moisture protection. I use Schluter Systems on all my bathroom renovation jobs. To me, it’s the best, most comprehensive system and they are always introducing new accessories to make my job easier.
Schluter KERDI-BOARD is lightweight, easy to cut, waterproof, and vapour-retardant. It’s the ideal substrate and building panel for walls, ceilings, and floors. I use it for all my wall tile installations. It’s so versatile and strong that you can create almost anything out of KERDI-BOARD including shower benches, curbs, knee walls and shower niches, shelving, and floating shelves.
RELATED
How to Waterproof for Bathroom Floor
Waterproofing your floor is another important step in making your bathroom watertight. Assuming your subfloor is in good shape and level, your next step is waterproofing. Use a layer of unmodified thin-set mortar on your substrate, then add an uncoupling membrane, like Schluter®-DITRA & DITRA-XL. Then add another layer of thin-set mortar on top of the membrane, and finally, you place your tiles. Don’t use modified thin-set mortar because it relies on air to cure correctly. The tile and waterproof membrane don’t breathe. That means no airflow, and it would take forever to dry.
All floors expand and contract with moisture content, including the substrate or subfloor, and when this happens, you’ll start to see your tiles and grout crack. The uncoupling membrane is critical because it allows the substrate to expand and contract, preventing your new tile and grout from cracking. You don’t want to skip this step. Material selection plays a significant role in achieving a watertight bathroom renovation, but it also needs to be installed properly.
RELATED
How to Waterproof for Bathroom Ceiling
Waterproofing the ceiling of your bathroom is especially important in the wet zones of a bathroom, like in the shower or steam shower area or when you plan to tile the entire ceiling. To ensure a watertight bathroom you have several options. Use Schluter® KERDI-Board with Schluter® KERDI-BAND and water proofing corners, like Schluter®-KERDI-KERECK-F/-KERS-B or use a mould resistant drywall and Schluter KERDI-DS.
RELATED

It is critical that you create a waterproof seal between the tile and the window.
Waterproofing Around A Window
Keep in mind that with tile it is extremely important to create a watertight seal between the tile and the window. This is done to ensure that no water gets through to any of the window structures because just using tile is not enough.
The waterproof seal is critical and there are a number of products that will help ensure proper sealing between the tile and the window by using Schluter® KERDI-BAND and Schluter® Kerdi-Fix in conjunction with Schluter® KERDI-BOARD.
RELATED
Sealing Around Pipes
The best way to seal around pipes is to use Schluter®-KERDI-SEAL-PS (a pre-cut collar of the KERDI waterproofing membrane). It is designed to seal around pipes or other similar elements through KERDI or DITRA/DITRA-XL membranes and you can get these prefabricated.
Speaking of pipes, remember plumbing is not a DIY job, so hire a pro – it’s worth the peace of mind knowing your install is done correctly. Also, it’s helpful to make sure your service access panel is easily accessible, when and if repairs are needed.
Building A Tub Surround
Tub surrounds are still popular and they can turn an ordinary tub into a luxurious one! However, like most materials that go into a bathroom renovation, the tub surround should be waterproof.
Schluter-KERDI-TUBKIT makes a kit that is easy to use and eliminates leaks and mold growth due to moisture.
You can complete the bathtub platform with Schluter®-Profiles. Profiles provide a clean and elegant finish by eliminating the need for caulking while protecting tile edges and come in a wide range of styles and finishes to suit any décor.
RELATED
Use Inorganic Materials
Ceramic and porcelain tiles are the best choices for bathrooms.
Because your bathroom is a wet zone it’s better to use materials that are inorganic, like stone, metal, plastic, ceramic, or porcelain tile because they are not affected by moisture and will resist mold, mildew, and rot.
For example, you may want to consider using PVC baseboards instead of solid wood baseboards, use ceramic or porcelain tile for floors and walls, and consider quartz or natural stone for countertops instead of plastic laminate countertops with an MDF core that can be affected by excessive moisture.
If you don’t choose tile for the flooring another good option is plastic laminate flooring.
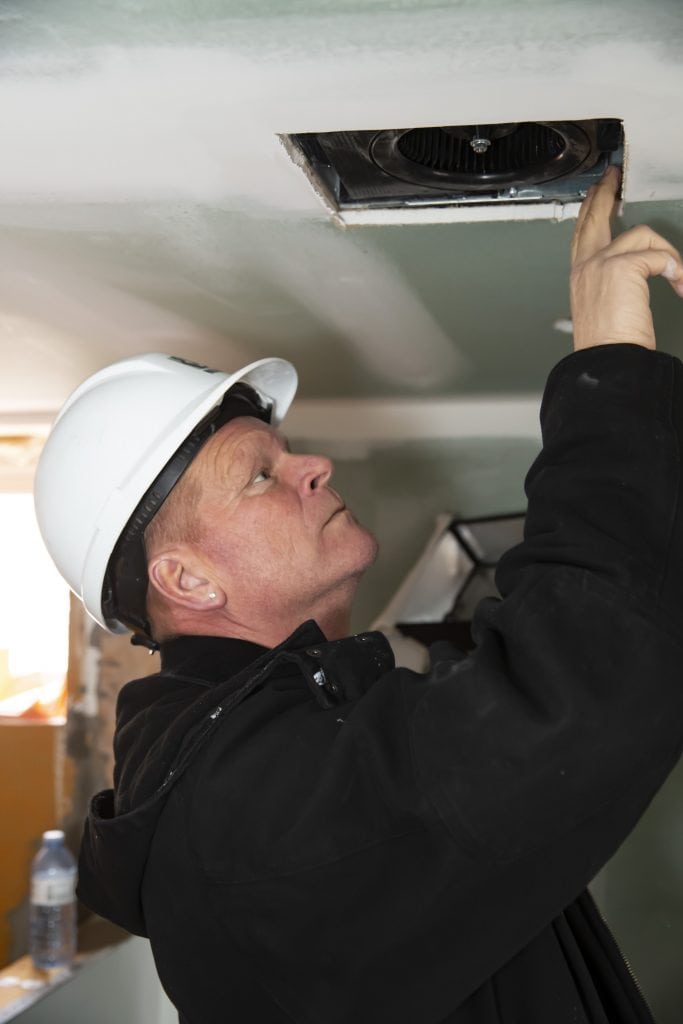
Install a High-Quality Exhaust Fan
Run your exhaust fan for at least 30 minutes after a shower or hot bath, from Holmes & Holmes S1.
I know I sound like a broken record but the importance of exhaust fans and proper ventilation is the key to removing excess moisture from your indoor air. Effective ventilation ensures that you have good indoor air quality.
Showers and hot baths produce a large amount of moisture and if not properly ventilated will cause damage to your walls and ceilings. Make sure you run your exhaust fan for at least 30 minutes after a shower or hot bath.
It’s also critical that you leave the door or a window open to allow for proper airflow. In all our jobs, we now install exhaust fans with sensors and timers. These fans are activated by motion and moisture levels and are a great addition in case you forget to switch on the exhaust fan yourself.
Finally, it is important to make sure your fans are vented to the outside and not your attic!
Building properly and using the RIGHT MATERIALS helps us avoid problems that come with water damage resulting in mold, mildew, and rot.
RELATED
Do’s & Don’ts of Bathroom Renos
Flooring Guide For Your Bathrooms – Do’s & Don’ts
Related Articles

Why Mike Holmes Jr. Chose...
Best Eco-Friendly Shingles: Mike Holmes Jr. on Atlas Roofing Technology When you’re building your...

Mike Holmes on the Most...
Upgrade Your Roofing Knowledge: Mike Holmes on Advanced Shingle Technology You know I’m all about...

The Best Field Service Management...
Service Fusion Review: Best Field Service Management (FSM) Software for Growing Contractors Running a contracting...