

Roof & Gutter Protection: Your Complete Homeowner FAQ Guide On this new Holmes on Homes podcast episode with Mike Holmes and Leaf Home and Erie Home leaders Jenilee Common...

How To Install A Wainscoting Feature Wall
By
Mike’s Advice / Mike Jr
Monday, June 8th, 2020 @ 2:29pm
When I built my dream home with my wife Lisa Marie, we decided to do a feature wall. This project, like many others, started from a random idea. While we were brainstorming a place on the second storey to incorporate a feature wall of wainscoting, Derek had a brainwave involving our cathedral wall. He mentioned that he’d never seen that style of wall done in wainscoting and suggested we take that on as our project. We knew we’d found the right idea because we were all excited to take on this project.
Before you look into installing a wainscoting wall, do your homework on the materials needed.
MATERIALS LIST:
- Construction adhesive
- medium density fiberboard (MDF)
- 3mm hardboard (as a backer behind the wainscotting)
- 18 gauge finishing nailer
- Wood filler
- Wood glue
- Safety glasses
- Mask for when sanding MDF
Step 1: Calculating the Wainscoting
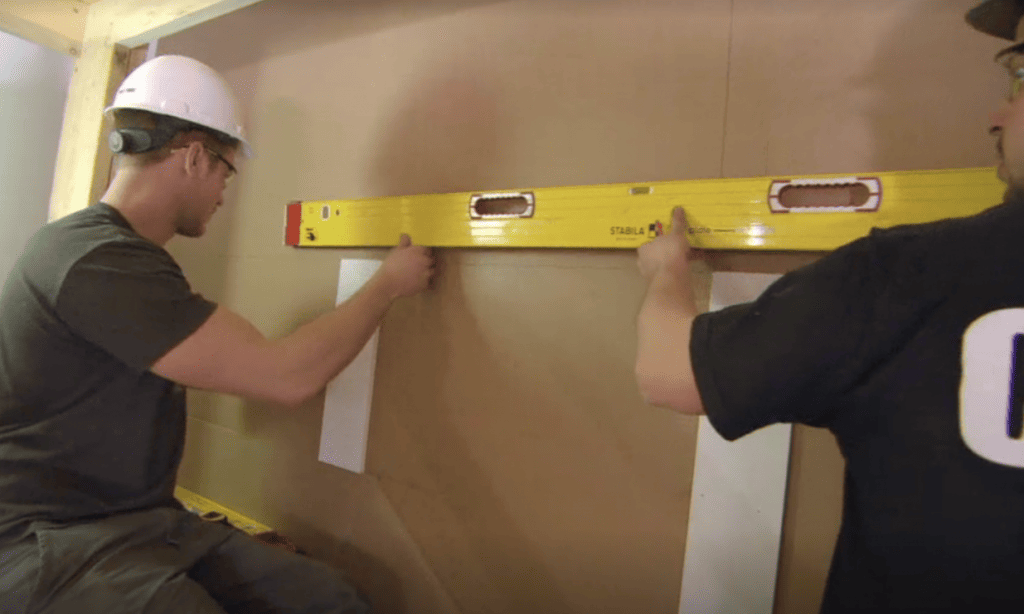
First, we set our laser level to use as a guideline while we measured the peak of the cathedral. Using the full height, starting from the bottom of the landing, right to the top of our peak. Then, by measuring the widest part of the wall, we were able to create a rough sketch of the room and start filling in measurements.
Calculating wainscoting for any wall is a pretty simple process.
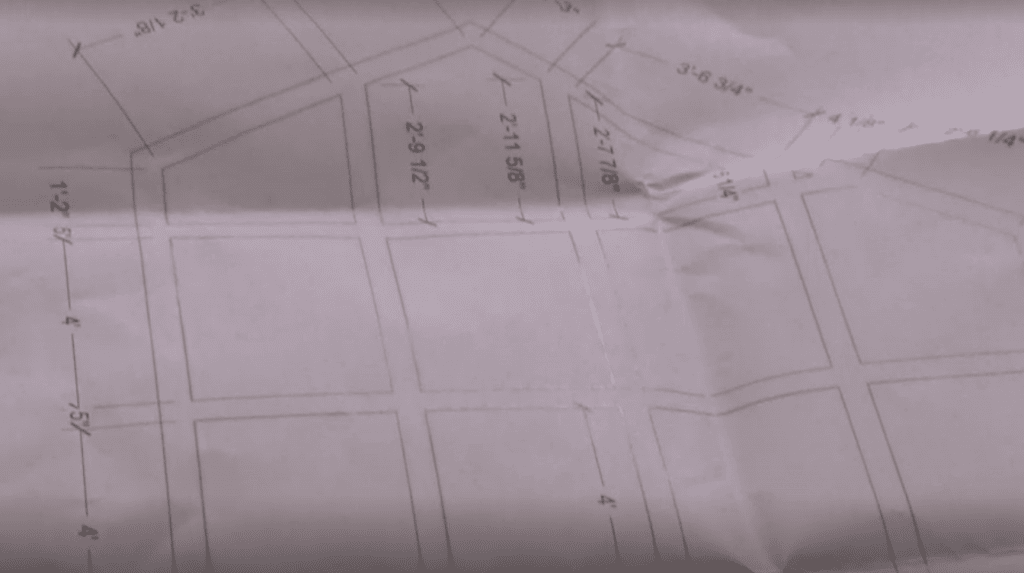
Once you decide the size of your panels, rails, and stiles, it just takes some simple math.
We wanted wainscotting panels between 24”-30” wide by 48” tall, and our rails and stiles to be 5” wide. From there, we divided the width of the room by 30” which showed us we’d need roughly 5 panels. But the work isn’t done there. We had to include the thickness of the stiles which is 5”. Since we have 5 panels wide on the wall, we have to subtract 30” for the width of the stiles – which is 6 stiles at 5”. From there, we divided the rest of the width of the room by 5 giving us our inside width of each box.
We repeated the same process with the height of the boxes. In a cathedral wall, it’s impossible to have the same size boxes everywhere due to it’s sloping height, so we had to decide where we wanted our smaller boxes.
In our ceiling, specifically, the two roof pitches were different on either side of the slope. We decided to start our rail where the roof pitch met the right wall (facing the feature wall), that way it would minimize the amount of small boxes. This had the added bonus of placing smaller boxes up high enough where they wouldn’t bother anyone – mainly, me!. From there, we worked it out so the boxes were exactly 48”.
Glossary of Terms
Cathedral Ceiling: A pointed ceiling or a room that rises through multiple floors. The wall in my front entryway features a cathedral ceiling.
Panel: One unit of wainscoting is made of 5 parts: the panel, rails, and stiles. The panel is the large centre portion of each piece of wainscoting.
Rails: The two horizontal pieces that frame the panel are known as the rails.
Stiles: The pieces that frame the wainscoting vertically are the stiles.
Step 2: Laying It Out
Next up we needed to chalk our layout on the wall, so we can decide if we like the layout before actually cutting and installing.
Something I learned here, that I’d definitely do in the future, would be to install the 3mm hardboard as a backer FIRST before chalking our layout on the wall. We were too excited and got ahead of ourselves.
We marked our studs on the wall and cut all of the 3mm hardboard first so that it landed on the centre of our rails and stiles. This would hide any screws used to fasten the sheets.
We glued the backs of the sheets using construction adhesive and started installing them. Finally, we used an 18 gauge nailer to nail the sheets to the dry wall and any other studs to make sure they were secure.
Once the hardboard sheets were installed, it was time to start installing the rails and stiles. We started from the bottom rail and ran a 9” piece of 3/4” MDF along the landing and stringers.

We used a 9” piece on the bottom to adjust for our layout to make the bottom box the same size as the rest.
*Tip* Each piece that connected to another, whether they were rails or stiles, should be biscuit jointed. Some people may say this is overkill, but MDF expands and contracts and can swell easily, so we REALLY want it to expand and contract together.
We worked our way up the wall going one section at a time, starting with the stiles, and then capping them with the rails, making the biscuit joints work a little easier. Once we finished all of the rails and stiles we got a great vision of how beautiful this wall was going to be!
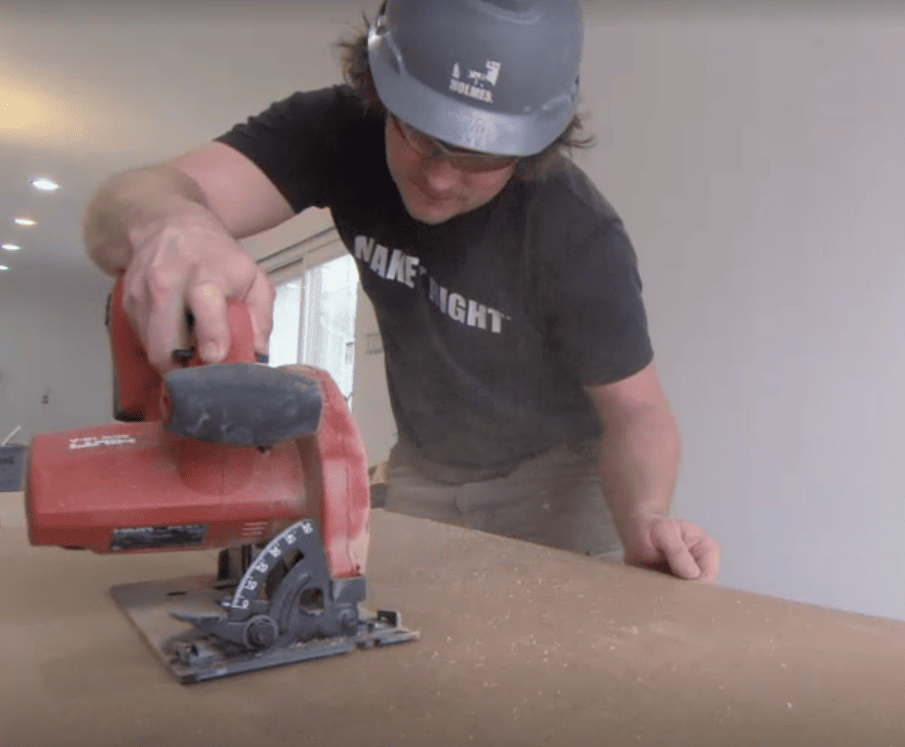
Now all that was left is to cut the shoe moulding for the insides of the boxes in order to complete the wainscoting look.
We mitred every corner of the shoe moulding and used a ton of glue! Any surface of the trim that would be touching another surface was glued. This would make sure that it all expanded and contracted together – like with the biscuit joints.
One thing I learned about working with MDF is that you can fill it and sand it after and make it look perfect, but once it starts to expand and contract, if you don’t glue and install it properly, the joints will crack, and THAT’S frustrating!
Step 3: Finishing Touches
Once all of the shoe moulding was installed, it was time for the fun part…filling and sanding. Does anyone like to fill all of the nail holes and sand? I hate it. However, I tried out a new wood filler for this called MH Ready Patch and I have to say, aside from it having my initials (which is a bonus) it was incredible to work with, dried fairly quickly and hard, and sanded very well.
We filled and sanded it 3 or 4 times, going over it with a fine-tooth comb, and then gave it a wipe down with a slightly damp rag. You don’t want it too wet!
After that, it was time for my second favourite job, caulking! Again, note the sarcasm. When you have to do that much caulking it becomes very tedious, caulking every single gap and transition to give it a seamless look once it’s sprayed.
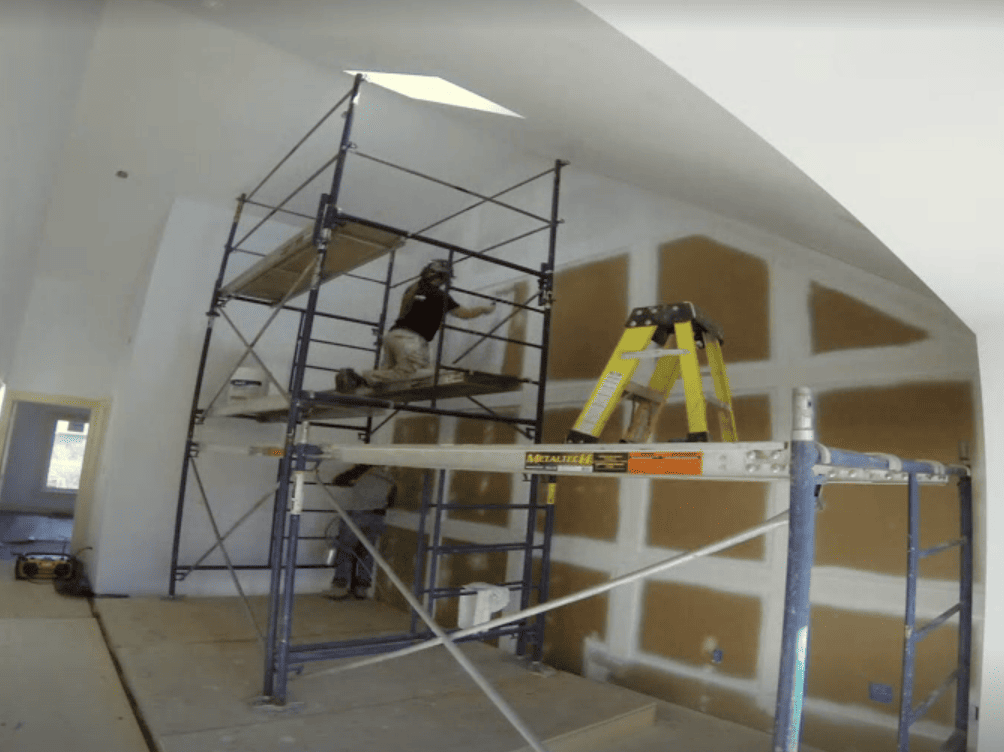
After that was finished, our friends, Tiffany and Jeff came in and put 2 coats of primer on with their paint sprayer and then another 2-3 coats of our custom paint colour and finish. In the end, all that tedious filling, sanding and caulking was worth it.
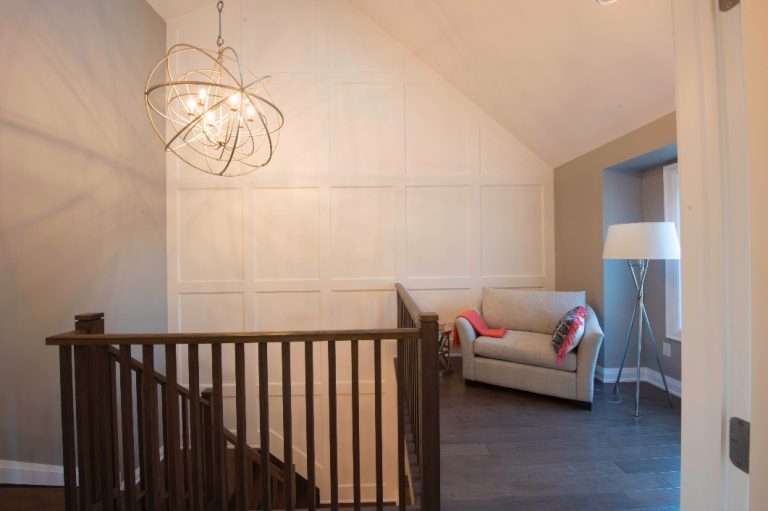
Because this is one heck of a feature wall!
READ NEXT: Building My First River Table
Related Articles
Behind the Scenes of Holmes...
Our season finale of Holmes Family Effect took us to The Fort. This is an...

Behind the Scenes of Holmes...
One thing about my shows is, most of the work we do is based out...

Behind the Scenes of Holmes...
The Solid State project was one of our most unique. This was a job that...