
Inside Episode 601: “Shaky Foundation” On Holmes on Homes, Mike Holmes has seen just about every construction nightmare imaginable—but Episode 601, “Shaky Foundation,” is one of the most alarming. Why?...
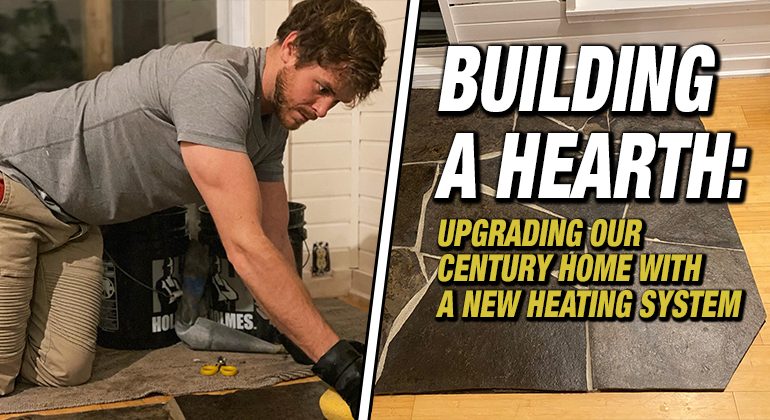
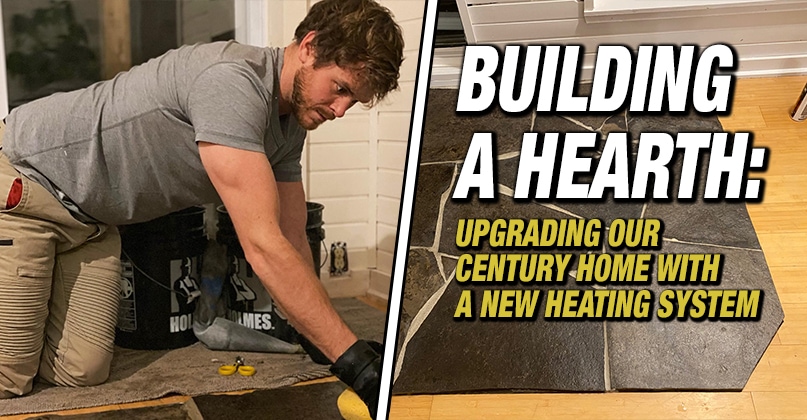
Building a Hearth: Upgrading Our Century Home with a New Heating System
By Mike Holmes Jr
Mike’s Advice / Flooring
Wednesday, February 24th, 2021 @ 4:13pm
A few years ago, my wife, Lisa Marie and I purchased a century home out in the country. Old homes come with a lot of bumps and bruises, but we found a home that had good bones, one we could take our time upgrading over the years, and of course, the location was absolutely perfect.
Over the years, previous homeowners had built two additions. So the original part of the home is heated through a forced air gas furnace, one addition was heated by a gas stove and the other is kept warm through baseboard heating. It’s a real chimera, but when all the systems work properly, the home is very comfortable.
This year, our old gas stove stopped working, so we decided it was time to upgrade the fireplace unit to heat the back part of our home. Choosing the right stove for our home took a lot of research but after talking to our friends at Napoleon we picked up a Napoleon S-Series wood stove for our home.

RELATED
We wanted a wood stove because we love the smell and ambiance of a wood stove and it’s more environmentally sustainable. We have all the resources we need to heat our home right in our backyard.
Meeting Code in a Century Home Upgrade
In order to prep for the new wood stove there was a few things we had to do. Our building code states that we needed to build a proper hearth for the new wood stove. Lisa Marie and I both really love a natural stone look, so we opted for a hearth made from black flagstone. Rather than having a rectangular hearth we decided to go with a hexagonal shape. This meant we’d need to remove some of our old flooring to lay down the flagstone. Before removing any of the flooring we taped off the area where we would remove material and replace it with flagstone to make sure that we liked the look of the shape. Believe me, this is something you want to measure out beforehand – not just eyeball it! Once we both agreed on it, it was time to get to work.
We’re usually so busy filming, that I don’t often have a chance to use my skills on our own home. I was really excited to bring out my tools for this project.

To cut the perimeter of the hearth, I used my trusty track saw.
TIP:
When cutting into hardwood floors or doors, use painters’ tape on both sides of the cutline to help prevent splintering of the wood from the blade.
Once the floor was cut, I removed it and pulled any nails/staples from the hardwood and started prepping for Schluter Systems DITRA uncoupling membrane. We always recommend using DITRA when laying floor tile or natural stone on top of a wooden subfloor to allow your tile and subfloor to expand and contract at different rates without cracking. In this case it was even more important because the heat from the wood stove would play an even bigger role in the flagstone’s expansion and contraction, so DITRA was a must.
To prep for the DITRA install I vacuumed and wiped the wooden subfloor with a wet sponge to remove dirt, dust, and debris. Then I cut the DITRA to size and mixed a batch of Schluter ALL-SET. If you’re using ALL-SET, make sure to follow the instructions on the back of thin-set bags, because it plays a very important role in a long-lasting, properly bonded floor.

Using 11/64” x 11/64” square notch trowel, I applied the thin-set to the subfloor.
TIP:
You can either use a roller with weight (under 75lbs) to help adhere the DITRA to the thin-set or use a grout float and apply even, consistent pressure across the DITRA to make sure it adheres properly to the subfloor.
Laying flagstone in a small area is like putting a puzzle together where you can’t get the pieces to fit perfectly together. So you need to be vigilant and keep an eye out for the right stone pattern. You want pieces that will work well together and leave small gaps between stone, all while LOOKING like they fit perfectly together. Now, when laying a 100% natural stone floor, it’s impossible to complete without making SOME cuts here and there, so I found a pattern that I liked and cut off the areas that didn’t fit.
Once I had my pattern figured out, I made another mix of Schluter ALL-SET and started laying the flagstone in the pattern that I came up with from right to left, making sure I got the back of the hearth laid down before it was too difficult. When laying stone or tile on DITRA, make sure to fill in the squares with thin-set as you lay your stone or tile down. It is important when tiling with natural stone (as well as porcelain and ceramic for that matter) that you back butter the stone with thin-set mortar. It fills in any voids and allows for a much better adhesion to the DITRA/subfloor.
After letting the stone dry for 24 hours, I gave it another clean and scrub before sealing it with a natural stone sealer.

I sealed it a total of 3 times (with 2 hours in between each coat) before mortaring the grout joints of the stone.
I waited 24 hours before mortaring the grout joints. When mortaring grout joints of natural stone, it helps to use a grout bag (similar to what you would use to ice cake). Keeping a bucket of clean water and a sponge handy are essential, as you need to clean the mortar off of the stone and give the grout joints a nice texture.

Continue to wipe the stone and grout joints with a clean sponge and water every hour or so after you finish for 2-3 times as the mortar sets up.
Lastly, wait 48 hours for the mortar to dry completely before giving the stone/mortar its final coat of natural stone sealer.

With the hearth all sealed up, it is time for the fireplace install!
WATCH NEXT:
Related Articles

Why High-Quality Furnace Filters Matter
When it comes to maintaining your home’s heating and cooling system, furnace filters might seem...

7 Tips for Choosing Non-Toxic...
Choose Non-Toxic, Eco-Friendly Kitchen Cabinets for a Healthier Home Kitchen cabinets and doors are a...

Your Complete Guide On Standby...
What You Need to Know When You Install a Standby Generator I recently had a...