
I love my kitchen but it’s not large so it gets messy fast – add two growing young daughters, a husband and a cat – you have to stay organized....
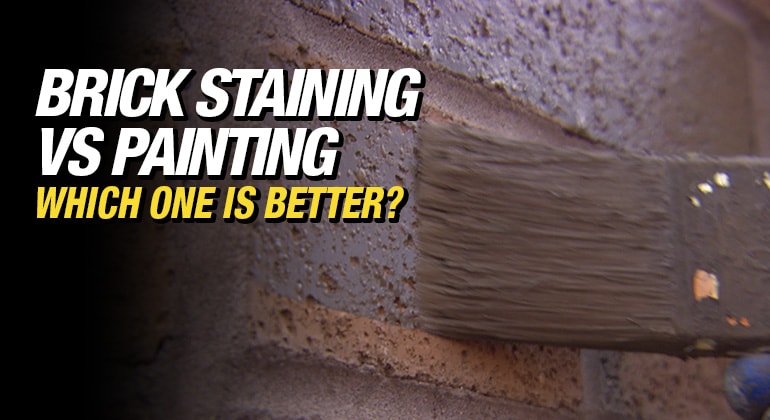
Brick Staining vs Painting. Which one is better?
By Mike Holmes
Mike’s Advice / Home Renovation
Monday, September 19th, 2022 @ 10:10am
Should you paint a brick house?
I don’t recommend painting your bricks (exterior or interior). Instead, look into staining your brickwork. Staining allows the brick to breathe while giving your exterior and interior vertical brickwork or masonry work, like a fireplace or exposed interior brick wall, new life. Here’s all about brick staining vs painting for your reference.

If you have the option to stain your bricks I recommend doing that over brick painting.
Is staining exterior brick a good idea?
One of the best ways to update the look is to stain it. As long as your brick is structurally sound and the surface isn’t painted.
Look for brick stains that are non-toxic, non-VOC, water repellent, UV resistant, and mold and algae deterrent and therefore sustainable. In my books, that’s a good thing.
Disadvantages of Painting Your Brick
- Paint can block brick’s porous nature. Remember brick needs to breathe and dissipate moisture.
- Acrylic or latex paints sit on the brick’s surface and form a film that traps moisture
- Paint doesn’t soak into the brick, so it’s not as long-lasting or durable as a stain.
Advantages of Painting Your Brick
- Brick painting covers the entire surface of the brick, including the mortar, with (usually) a thick layer of paint. This will give your brick a uniform, opaque appearance.
- One advantage of painting brick is that the paint covers all of the surface flaws. Patched areas are covered up.
- This is a better option for treated brick. Staining your brickwork may not be an option, since the stain needs to be absorbed into the brick. How do you know if the brick has been treated? It’s easy to test — just put water onto the surface of the brick, concrete, etc., that you want to stain. If the water is absorbed, you are good to go.
If the water pools on the surface, the brick cannot absorb liquid and probably has some sealant. This could cause some challenges and may require removing the sealant using a mild detergent, bristle brush, or a power washer. Either way, it’s best to consult with a brick-staining specialist.
Brick Staining. Should You Do It?
In my opinion, brick staining is a much better option than painting.
Here are some advantages of staining brick:
#1 Let the bricks breathe.
Mineral-based stains are breathable, bonded by crystallization, and will never peel. Why? The unique binding ingredient is potassium silicate, found in any mineral-based product. Potassium silicate is mined from rock and heated at a very high temperature to create a liquid. Then it recrystallizes back into a rock when it comes in contact with carbon dioxide. Basically, it becomes part of the brick being stained.
Paint remains on the surface. In comparison, the brick stain is a mineral product that soaks into the brick and becomes a part of the brick. It can never chip, bubble, or pull away from the brick.
#2 Change the look of your bricks.
You can make subtle or dramatic changes to the look of your bricks. See more color options for stains below.
#3 Low maintenance.
Brick stains are absorbed into the brick. This means the stain is not prone to chip away or peel like paint. You won’t have to worry about your color fading or having to do touch-ups all the time.
#4 Match the new with the old.
In a project for Holmes Family Rescue, we installed an elevator in a bungalow for a wonderful family. To do so, we had to replace the existing windows with much smaller windows. We added new brick to make up the difference. Brick staining was the perfect option here because we simply stained the new bricks to match the old ones. The result? Perfect match.
#5 Brick staining
is an excellent way to refresh your home. Staining not only can help protect the exterior brick of your home, it can also provide a modern update that can truly transform the look of your home, improving your home’s curb appeal and increasing the value of your home. Staining can last 40 to 50 years, with typical warranties that cover a 30-year period.
Colors for Brick Staining
Staining allows you to make subtle changes or more obvious changes to your brickwork — depending on the finish and thickness. The stain can be semi-transparent or opaque.
Semi-transparent finishes work with your existing brick colors. So if your brickwork is different shades, a semi-transparent finish will work well and allow the subtle variations in color to show.
Say you have red, orange, and brown brickwork, and your stain is a gray semi-transparent stain. Your stained bricks will look like a paler, mid, and darker version of the original colors.
Almost any color of the stain is available and most pros provide on-site custom color matching.
RELATED
How To Stain Brick
I recommend hiring a professional to stain your bricks. This is a very labor-intensive job, and best left to pros that have the right tools for it. On our projects, we use Permatint for all our brick staining. They have a great crew and are always thrilled with the results.
Required PPE for brick staining:
- Hard hat
- Safety glasses
- Steel toe boots/shoes
- Harness
- Safety vest
- First aid kit
- Disposable gloves
- Face masks
Tint Kit Necessities
- Brushes
- Mixing brush
- Pigment
- Brush/Pigment Bag
- Water
- Scoops
- Folding table (optional)
- Masking tape/Paper
- Small propane torch
- Scrapper
- Mr. Clean magic eraser
- Mixing pails
- Razor for windows
- Buckets and lids
- Non-scratch cleaning pads
- Drop sheet(s)
- Rags
- Garbage bags
- Wire brush
- 24’ Jaws ladder
- Step ladder
Here are the basic steps to stain your bricks:

Each individual brick is stained, which allows for detailed work and better control.
Prep Work Before Staining Brick
Before applying the brick stain, you can power wash (at low pressure) the surface if required to remove any excess dirt. Remember to remove plant vines on the walls of the house by wire brush and torch too. If tinting a concrete wall, a primer will be applied first.
It’s also important to note that some bricks may be too porous and will absorb the liquid too quickly, resulting in a chalky residue on the surface. If this happens, your brickwork may require a primer before the staining process can begin.
Repair Your Bricks
You will need to scrape out any damaged mortar and replace it. This is repointing. Whatever manufacturer you choose for the new mortar, make sure you follow their instructions correctly. Wait for a few days for the mortar to dry before staining your brick. Here is a full article on repointing.
Prepare your area
Protect and cover everything that the stain should not get on. This means your window sills, door frames, etc.
Choosing your Stain Application
Typically the stain is applied using a brush. This allows for better control of the technique and is more artistic, producing a more natural and thinner color. Using a brush also requires less prep work. However, if the house is being renovated with new soffits, windows, etc., and the design calls for a solid, painted look then a spray application may be considered.

One coat of semi-transparent stain is all that is required and most applications last for 40 to 50 years.
For semi-transparent stain application, it is always one base coat. If necessary, accent colors can be added afterward for artistic merit. For a solid/opaque look, use two coats of color.
Staining Your Fireplace
Use brick staining for interior features, like a brick fireplace or exposed internal wall. The stain has zero VOCs and is perfectly safe to use indoors. The process is no different from doing an exterior job, other than it will be much easier to do because it is a smaller job. This is actually something that CAN be a DIY project.
RELATED

A fireplace staining project by Permatint, is almost complete, note the various colored tints used.
Check out the transformation below:

A brick home before brick staining.

A progress shot of a gray semi-transparent colored stain application

What a transformation! Brick staining provides an updated look to this older home.
If done correctly, brick staining can protect your property from the weather and retain the integrity of the brick while also making the exterior look brand new. I love it and recommend this option if you are looking to give the exterior of your home a refresh. It can really transform your home.
READ NEXT
Exterior Painting Tips For Your Home
Spray Cork for Exterior
Related Articles

Holmes Crew Builds Accessible Oasis...
Holmes Makes it Right | Teacher Needed Help We are taking a look back at...
What Does Egress Mean On...
Egress windows are Emergency Exit Windows. This is a very important but often ignored feature...

5 EASY New Year’s Resolutions...
Why Home Improvement Resolutions Are the Key to a Fresh Start The New Year is...