
What You Need To Know about an ERV System and How to Install It Right For years, I’ve stressed the need for good indoor air quality, because a healthy home,...

Wet-Room Bathroom Waterproofing the Right Way
By Mike Holmes Jr
Mike’s Advice / Bathroom Renovation
Friday, January 30th, 2026 @ 11:21am
When Lisa Marie and I started planning our new primary bathroom, we agreed on one thing right away. We had to use Schluter Systems to ensure the wet-room bathroom waterproofing was done right! Especially since we were building a wet-room with a standalone island tub and a 36″ x 6′ curbless shower, it HAD to be watertight. No shortcuts. No guessing. A bathroom sees more water in a year than your roof does—so treat it like a roof. Make it watertight, or you’ll pay for it later.
I’ve seen what happens when water gets behind tile—humidity, moisture, daily use. Over time, it causes mold, loosens tiles, cracks grout, and eventually the tile completely detaches from the wall. I see it all the time. And mold? It’s not just ugly. It’s bad for your lungs and your health. Ventilation is essential, but so is waterproofing the entire bathroom properly.
That’s why I used Schluter Systems from top to bottom for our wet-room bathroom waterproofing.
Building a Watertight Wet-Room
The big question is: How do we make this whole space completely watertight?
JP from Schluter and I mapped out the plan which included:
- Schluter®-KERDI-BOARD on all the walls
- Schluter®-KERDI-BAND and thinset on screws, seams, edges, and corners
- Schluter®-DITRA-HEAT DUO on the floor—this gives us heated floors with one single heating zone AND soundcontrol
- Schluter ALL-SET® a thin-set mortar specifically for use with Schluter® membranes and boards
- Schluter®-KERDI-BOARD on the ceiling
All this provides a continuous watertight envelope before we lay a single tile.
PRO TIP: The heated floors will actually help dry the room faster—exactly what you want in a wet-room.
Slopes, Drains & Real-Life Horror Stories
If you want a curbless shower, your slope has to be perfect. Water travels the path of least resistance, and if the slope is wrong, you’re in trouble.
On one of our jobs, we encountered a curbless shower where the floor sloped AWAY from the drain—toward the corner of the bathroom. All the rot and mold built up in that one spot. They thought it was the drain leaking, but it was actually a bad floor.
That’s why we’re doing this one properly and creating a:
- Level base for the tub
- Dry pack or sand bed for a perfectly designed slope for the shower
Schluter®-KERDI-BAND on top to seal the entire assembly
DITRA on the Floors, KERDI on the Walls and Ceiling
An uncoupling membrane like DITRA is essential under a tiled floor —especially on wood subfloors. It lets the tile and substrate expand and contract at different rates, protects the system when heated floors are running, and keeps everything watertight.
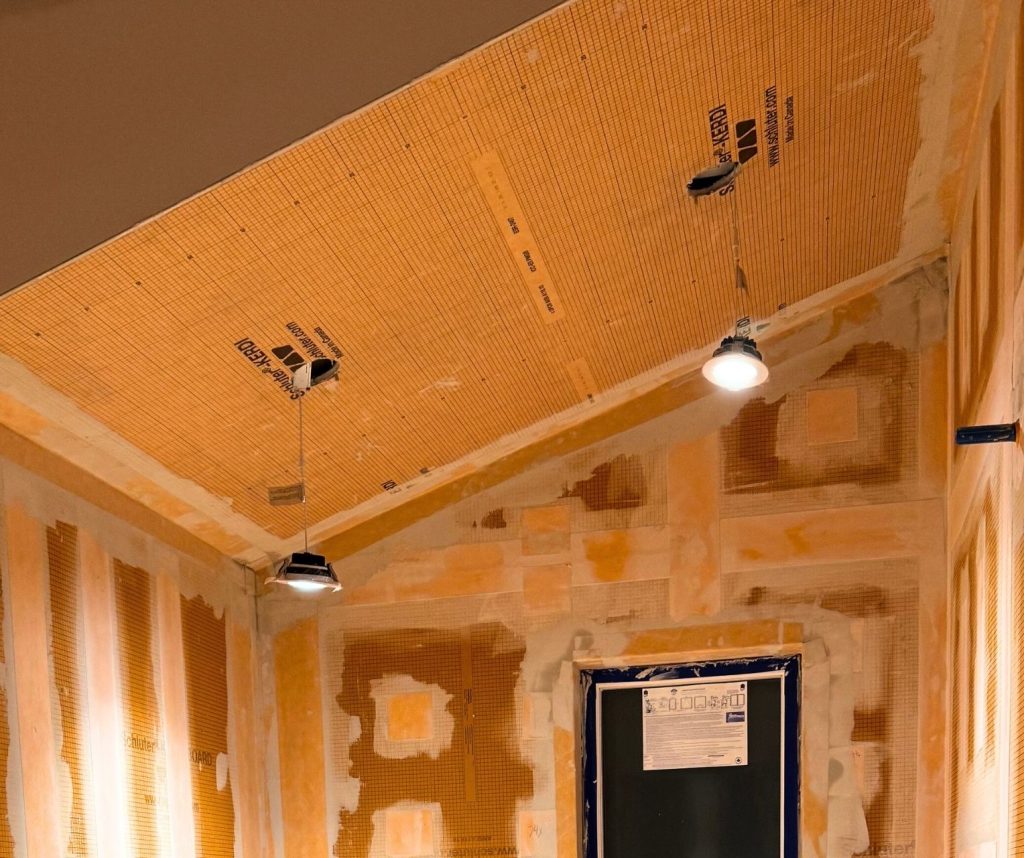
KERDI-BOARD on the walls and KERDI membrane on the ceiling provides a strong, waterproof tile substrate.
Schluter Systems protects your investment and the lifespan of your bathroom. In my opinion, worth every penny.
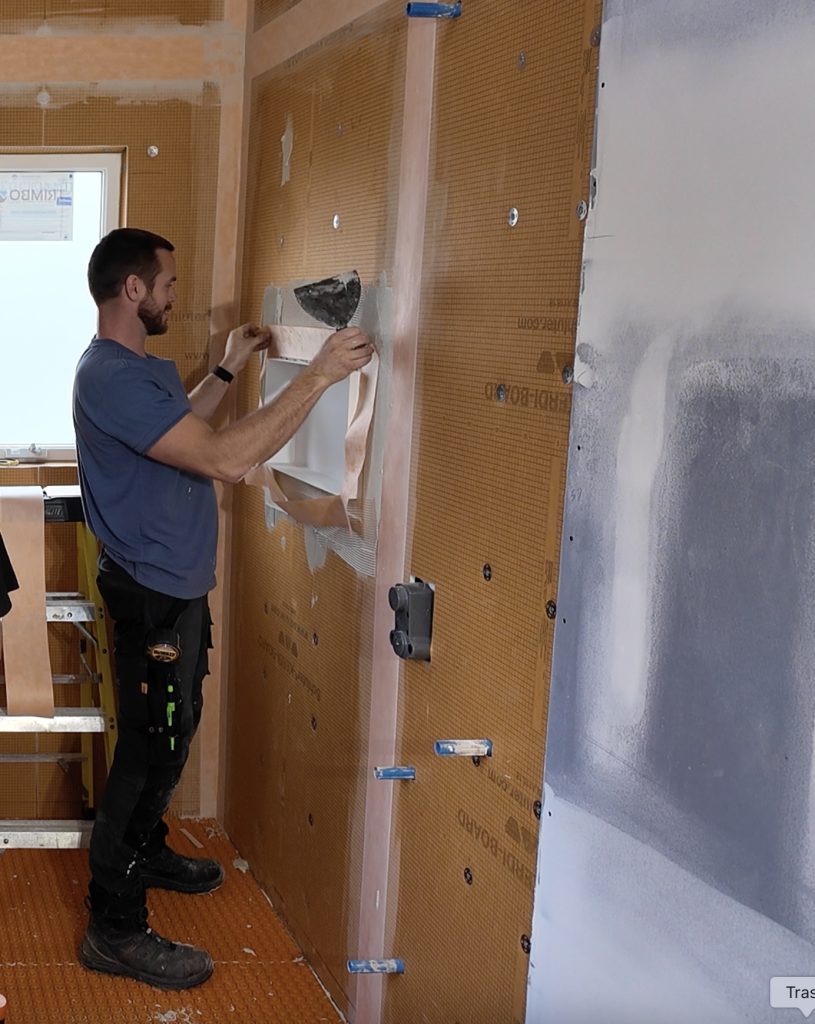
Game-Changer: The New Pre-Finished Schluter DESIGN-NICHE
We installed Schluter’s new pre-finished niche, and honestly—it’s fantastic.
- No need to build a niche
- No waterproofing inside the box
- No tiling inside it
- Five color options
- Powder-coated finish
- Can be flush with the tile or have a reveal
- Allows for added accent trims for custom detail

I used Schluter®-KERDI-FIX around the perimeter, thin-set, then adhered the pre-cut band around the entire niche, wiped clean, and moved on. I taped the edges of the niche to protect it during tiling. Fast, clean, and elegant.
Tools, Tips & Avoiding Common Mistakes
JP told me the biggest KERDI-BOARD mistake he sees is over-countersinking the washers. Ideally, you want to create a small divot, not a hole – that has to be filled with thinset. Tighten the washer just enough. If you need extra washers and screws, add them.
Here’s what I used for this project:
- KERDI trowels
- Pre-cut KERDI-BAND strips, corners, and squares
I love working with the pros because you always learn something new and JP was invaluable to this experience. The best tip?
PRO TIP: Cut a slit in the KERDI-BAND tape box lid and thread the strip through the openning—the strip glides out every time! Genius!
Prep All Your Strips, Corners and Squares in Advance
Another essential step in waterproofing our wet-room was ensuring all the seams were properly sealed. Prep all your bands (strips, corners, and squares) in advance because time is money. And using a “hawk” or mortar board holder typically used by drywallers, makes applying thin set faster and cleaner and saves trips to the bucket of mortar.
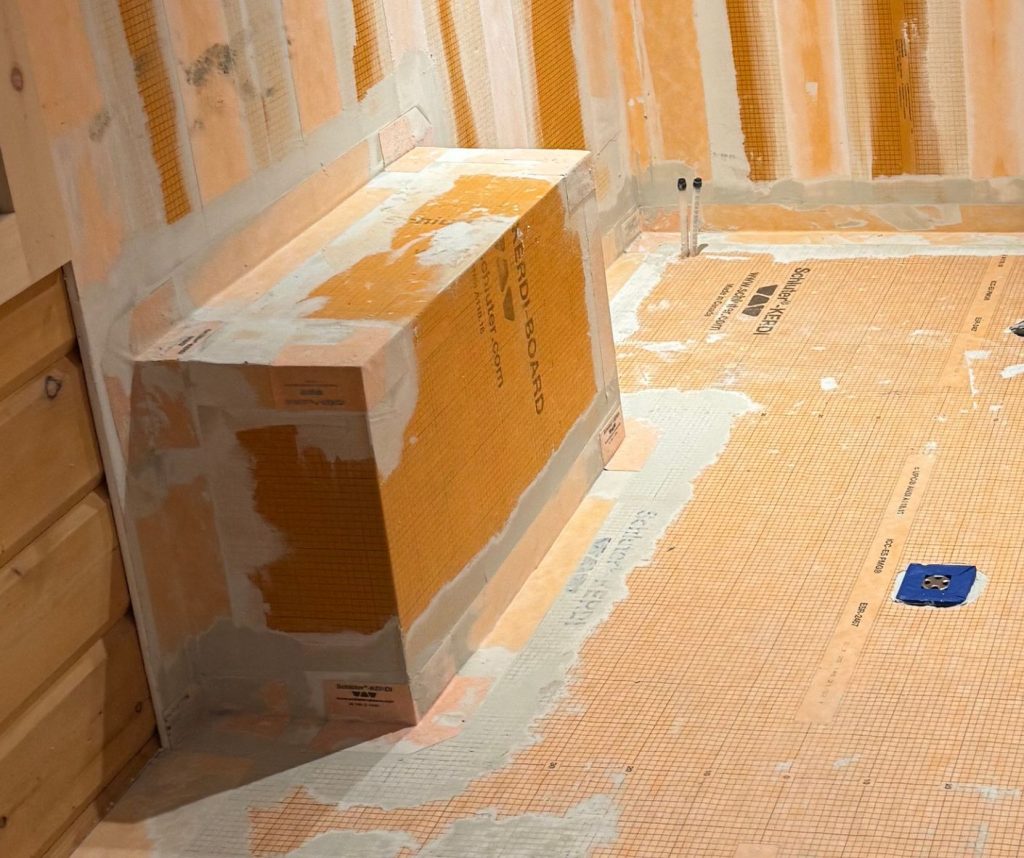
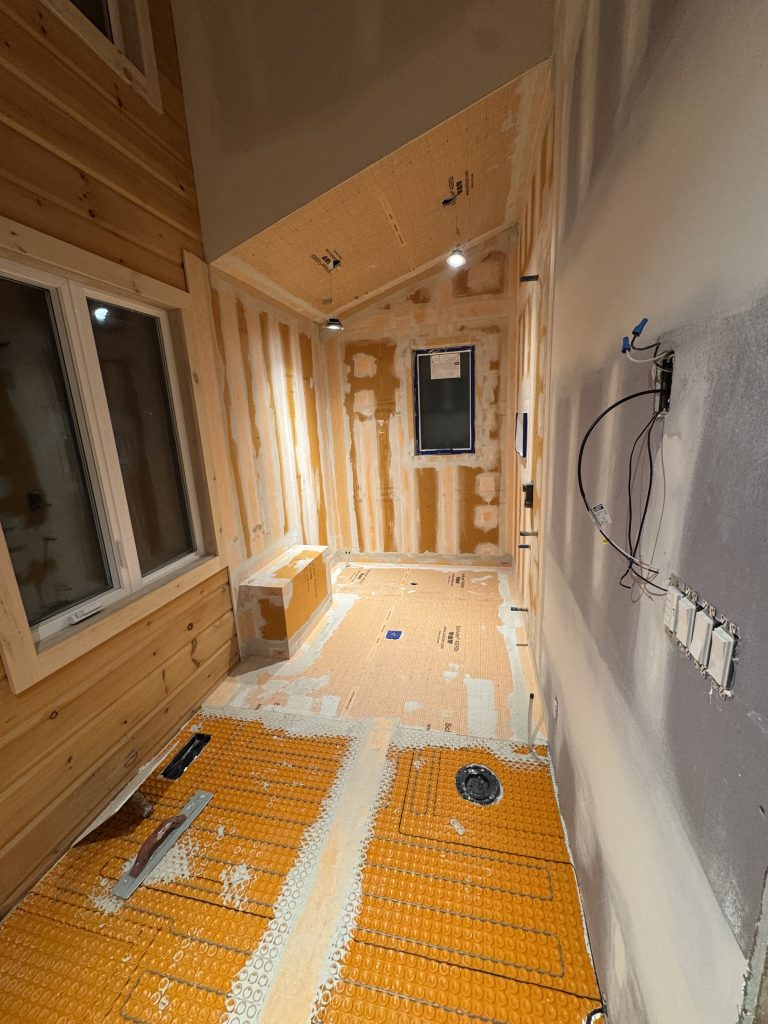
Floor Build-Up
The floor needed to be prepped to accommodate a flat even surface for the standalone island tub but it also needed to be properly sloped for the drainage of the large curbless shower. Plus, we wanted a heated floor to help keep the room dry and comfortable all year round.
The floor build-up included:
- Dry-Pack Mortar/Mud Bed
- Schluter®-DITRA-HEAT-DUO
- Heating cables**
- Tile
**Remember, once the heating cables are laid into the membrane and tested, a licensed electrician must step in immediately. They’re required to connect the cold leads, install the thermostat, and tie the system into the main panel. All final electrical connections must be completed by a qualified electrician—that’s the only way to meet building codes, ensure safety and the manufacturer’s warranty.
Now this is complete, I’m ready to start tiling, adding fixtures, lighting, cabinets, vanity and toilet.
Why Schluter? Because It’s Built to Last
Using Schluter Systems to waterproof our wet-room was a no brainer. Schluter Systems is versatile, customizable, and they have a solution for almost anything you can dream up in a bathroom. When you’re building a wet-room, a curbless shower, or a high-performance bathroom like ours, you need a waterproofing system you can trust.
Bathrooms aren’t cheap. Protect your investment. Use a system that actually works—and keeps mould, mildew, and rot where they belong: out of your home.
With Schluter, we’re building a space that’s not only beautiful—but also healthy, durable, quiet, and built to last.
READ NEXT
Related Articles

9 Common Electrical Problems in...
Warning Signs of Electrical Problems My goal is to educate homeowners everywhere to be more...

Why We Love the New...
When it comes to designing a shower that’s both beautiful and functional, small details can...

What Not To Flush Down...
Things That Shouldn't Get Flushed Down The Toilet In a recent episode of the "Homes...